Here is how to set up a VPN (OpenVPN) on your Linux Mint.
Before we start an active ZoogVPN subscription is required and your device must be connected to the Internet.
You need full administrative privileges on your computer.
Also, at this link, you can find instructions on how to set up the PPTP protocol on Linux Mint.
Step 1 – Open Terminal
Open the terminal using the key combination Ctrl+Alt+T.
Step 2 – System Update
Before installing and configuring OpenVPN, a good recommendation is to update your system, to do this, type the command in your terminal:
‘sudo apt update && sudo apt upgrade ‘
Step 3 – Installing the OpenVPN
Once you have updated your system, install the OpenVPN application on your computer using the prescribed command in the terminal:
‘sudo apt install network-manager-openvpn network-manager-openvpn-gnome’
Don’t worry if you are asked for your administrator password after running this command, this is normal practice, just enter your administrator password to complete the installation.
Also, to make sure that OpenVPN is installed correctly, you can check the version of the installed application. Use the command to do this:
‘openvpn –version’
If the application version is displayed correctly, then everything is installed successfully.
Step 4 – Download Configuration Files and Authority Certificate
To set up OpenVPN on Linux Mint you need to download the configuration files and ca certificate in your ZoogVPN account.
Step 5 – Unzipping the OpenVPN Configuration File
The next step is to find the installed configuration file and unzip it, you can do this by clicking on the file, and from the drop-down list, selecting “Extract Here”.
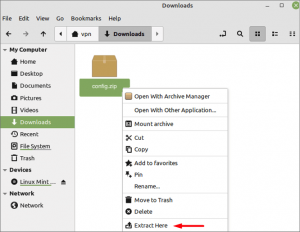
Now your configuration file has been unzipped and you will be added a folder where you can view all the servers available to connect to you.
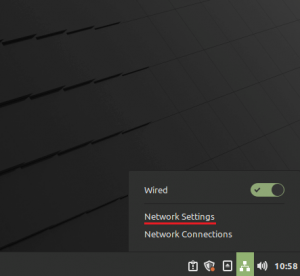
Step 6 – Path to the OpenVPN Connection Settings Window
In the bottom right corner of your screen, click on the network icon and navigate to “Network Settings”.
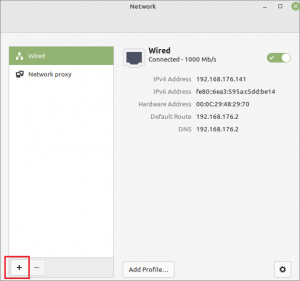
Next, in the network section, click on the “+” in the lower left corner.
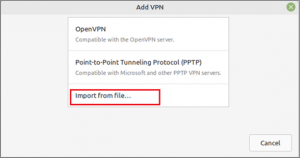
In the window that opens, choose the “Import from file…”.
Step 7 – Selecting a Server to Connect to
At this stage, you need to navigate to the unzipped configuration file and select the server and protocol you want to connect to from the available list. Click “Open” to continue.
Step 8 – Configuring the Connection to OpenVPN
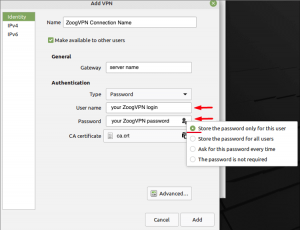
Next, you will see a window where you need to set up a profile for your VPN connection. To do this, specify the name of your connection in the Name line, it can be anything.
The Gateway field will be automatically filled with the address of the server you have chosen.
In the Authentication section, select the Password type and fill in the username and password that you used to create your ZoogVPN account. When entering a password, select the option to store the password for this user only.
In the Certificate field, import the ca.crt file that you previously installed from the ZoogVPN account.
Also, go to the IPv6 section and move the slider to the disabled position as shown in the screenshot below.
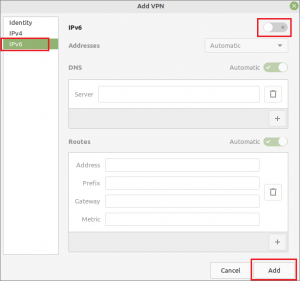
To save all settings, click the “Add” button.
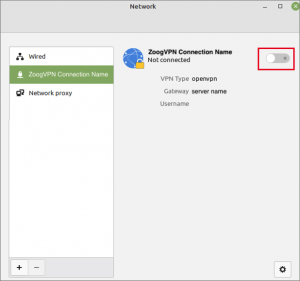
Step 9 – Enable the Configured VPN
To enable VPN, go back to Network Settings, and in the section of the connection you configured, move the slider to the enabled position. If the connection is successful, your status will change from not connected to connected.
Now after completing all the steps, your connection on your computer is protected with the reliable ZoogVPN.
Enjoy the Internet without limits today with ZoogVPN!
Didn’t find an answer to your question? Contact our 24/7 customer support team here.


