Before we start an active ZoogVPN subscription is required and your device must be connected to the Internet.
OpenVPN is an open-source VPN protocol that makes use of virtual private network (VPN) techniques to establish safe site-to-site or point-to-point connections.
Setting up OpenVPN on Asus RT-AX58U
- Access your Asus router’s administrative panel by entering its local IP address into your web browser’s URL bar. By default, this address is 192.168.50.1. You also might have customized it during the initial setup of your router.
In case you’re unsure about your router’s IP address, there’s an opportunity to log in using the URL: router.asus.com, provided you don’t have a VPN enabled on the device where you’re setting up AsusWRT. Use your Asus router account credentials to sign in.
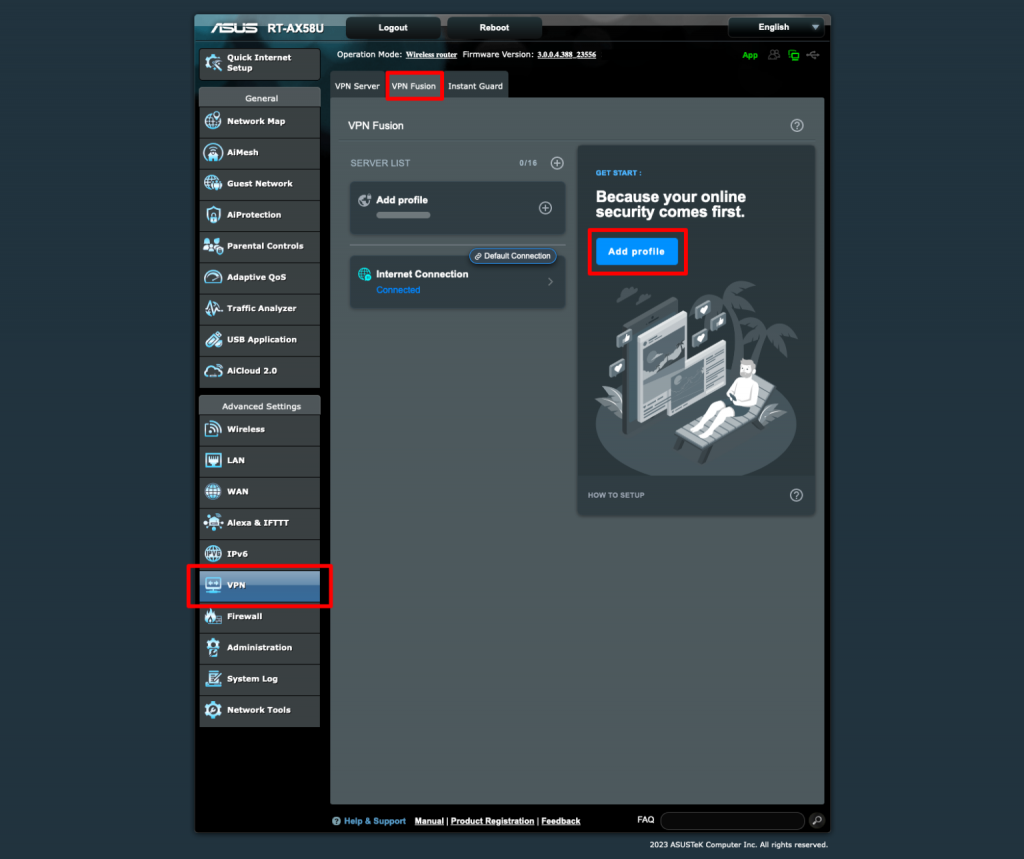
- Navigate to “Advanced Settings”, then go to “VPN”, followed by the “VPN Fusion” tab, and click on “Add profile”.
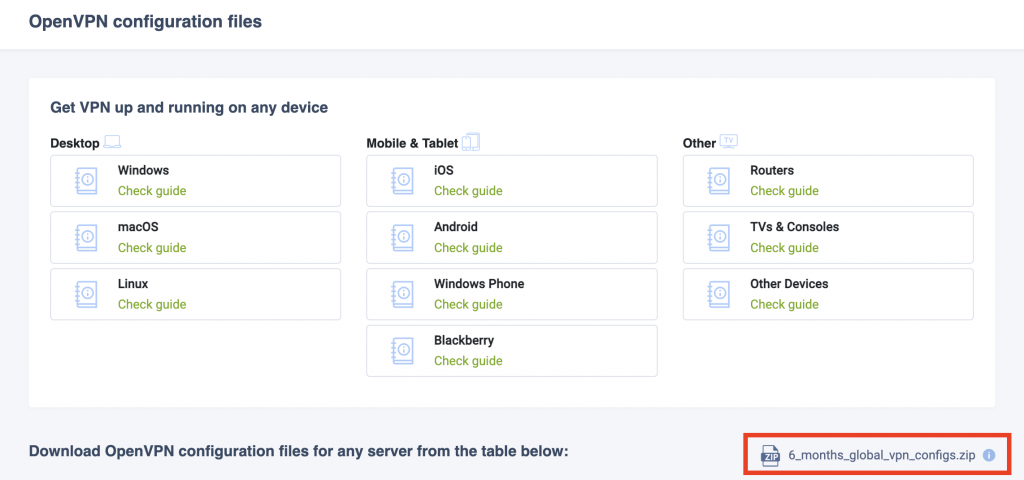
- Download the OpenVPN configuration file(s) following this link.
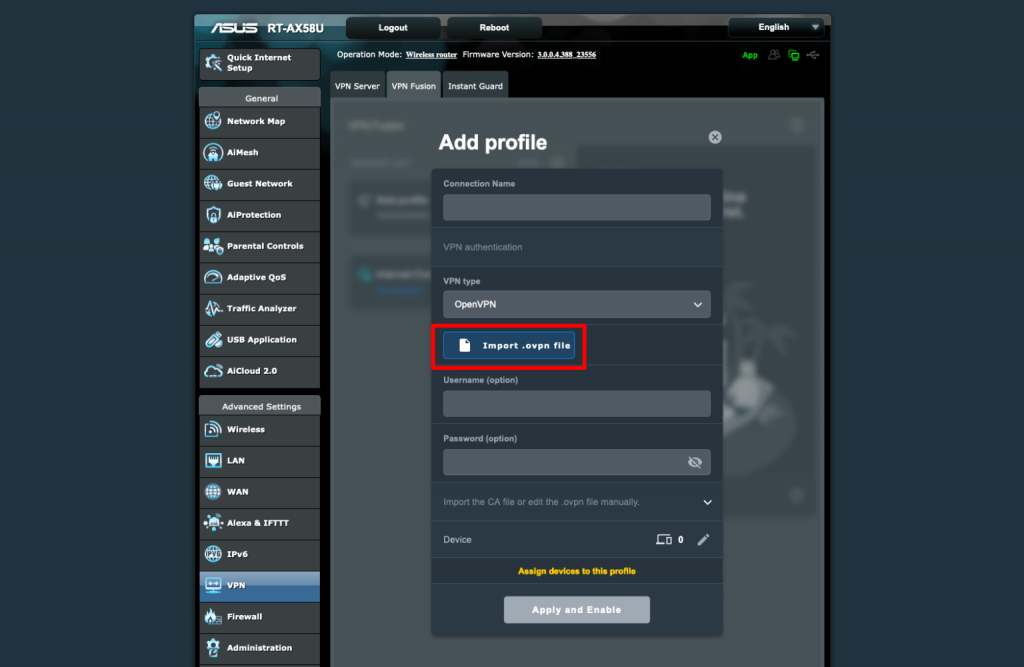
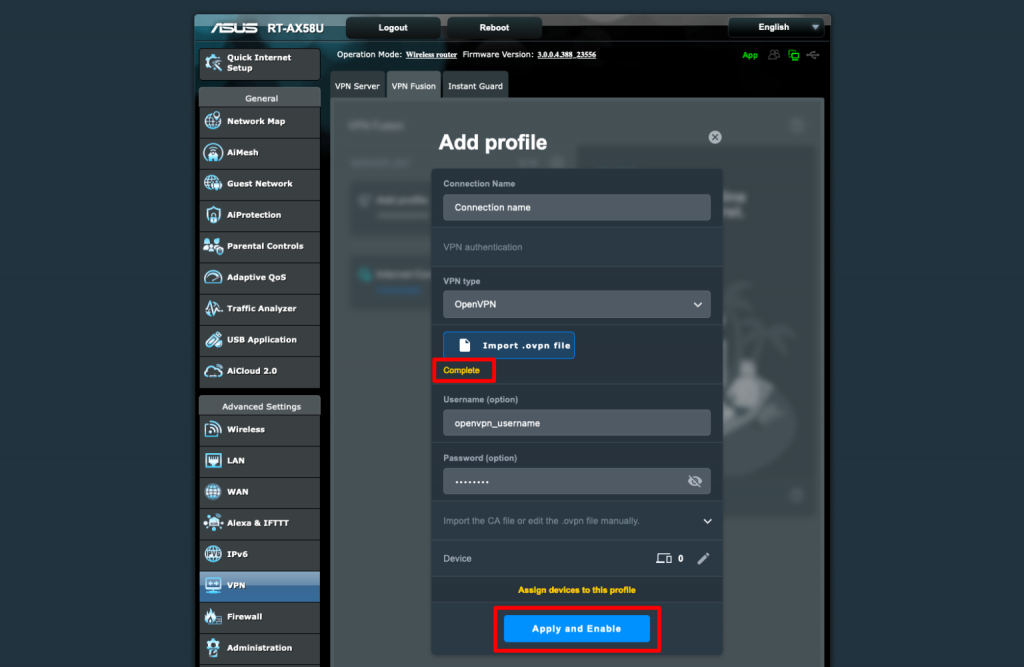
- Returning to your Asus router’s administrative page, input the data as mentioned below:
- Connection Name: You can choose any name you prefer (e.g., ZoogVPN).
- VPN type: Select OpenVPN.
- Username: Your ZoogVPN username.
- Password: Your ZoogVPN password.
Once you have entered all the required information, proceed by clicking on the “Import .ovpn file” button. Then, apply your system’s file manager to locate the OpenVPN configuration file you downloaded in step 4.
When completed, you’ll receive a notification indicating that the process is finished. Click on “Apply” and then “Enable” to proceed.
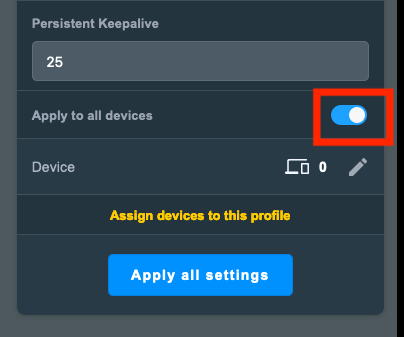
- Navigate to “Advanced Settings”, then “VPN”, and “Profile” to activate the “Apply to all devices” switch. Thus, all connections are directed through the VPN interface. Finally, tap on “Apply all settings” to complete the setup.
How to connect to ZoogVPN
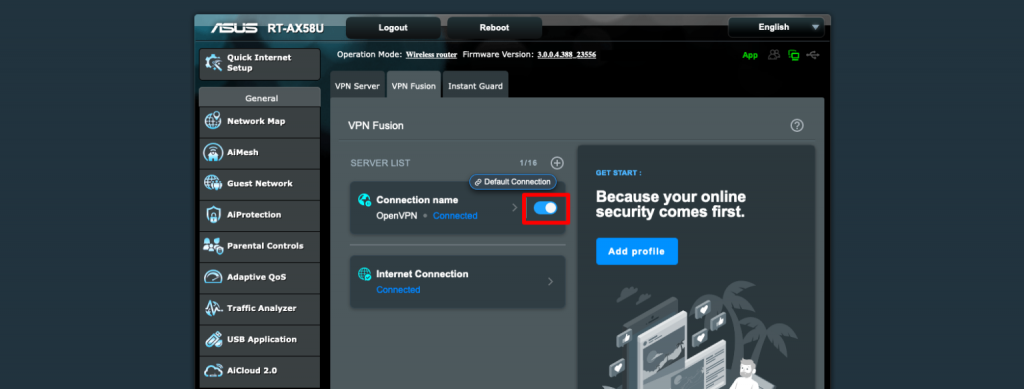
After you’ve initially set up the connection and clicked “Apply and Enable,” a VPN connection will be established. To connect later, navigate to “Advanced Settings”, continue with “VPN”, and “VPN Fusion tab” to toggle the switch next to your new connection.
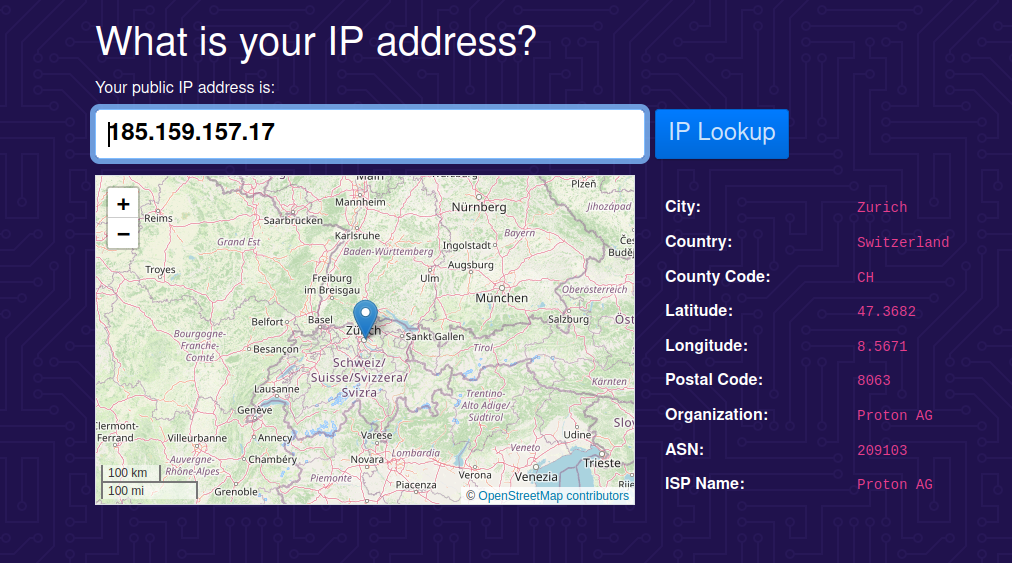
To verify the completion and functionality of the AsusWRT router VPN setup, navigate to ip.me using a web browser.
To disconnect the AsusWRT VPN connection, simply navigate to the VPN Fusion page and switch the toggle off.
Asus Router OpenVPN Installation
Step 1 – Log in to the control panel
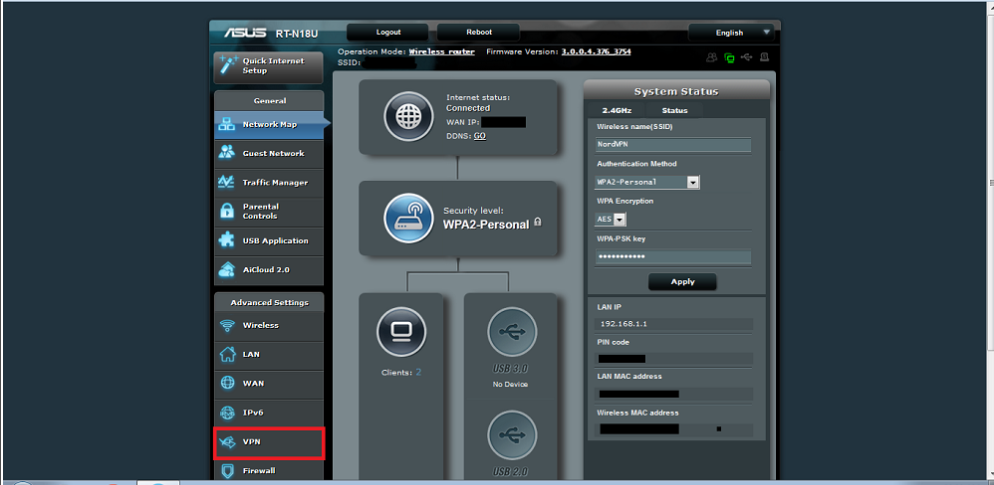
First, you need to log in to the control panel of your Asus router. You can do that by typing 192.168.1.1 in the address bar of your browser. A window will pop up, asking you to enter your username and password. Unless you have changed your credentials, the default username is admin, and the default password is admin
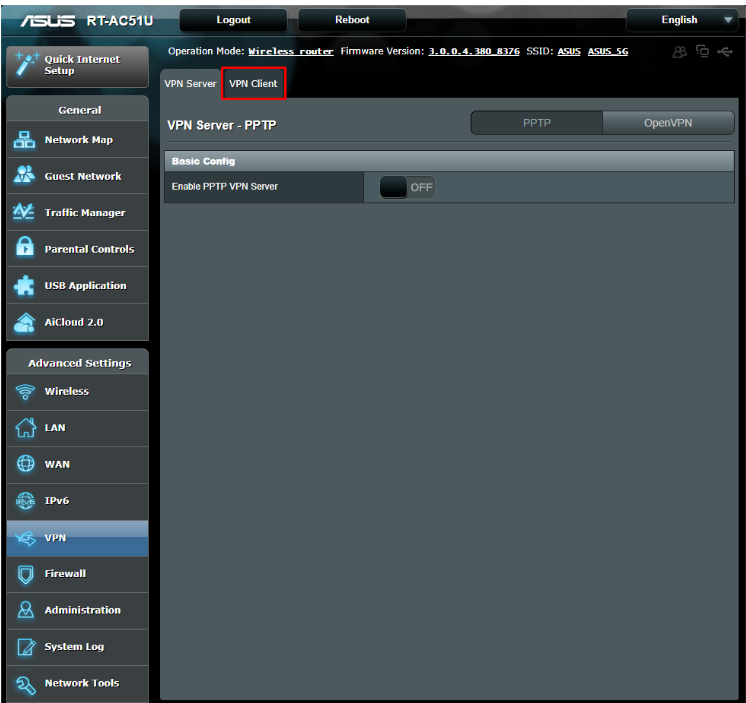
Once you have logged in to the Control Panel, select VPN in the left sidebar menu.
Step 2 – Open VPN Client
Click on the VPN Client tab at the top of the page.
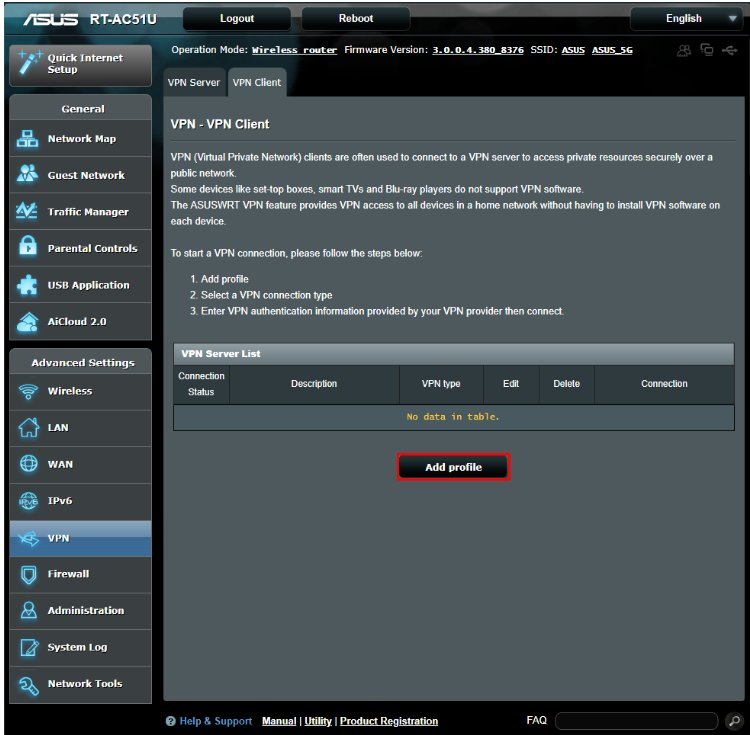
Step 3 – Add profile
Click on the Add profile button at the bottom of the page.
Step 4 – Set up a connection
In the pop-up window, select the OpenVPN tab and fill in the fields:
Description: you can give the connection any name you like
Username: your ZoogVPN service username
Password: your ZoogVPN service password
Auto reconnection: yes<
Step 5 – Download Configuration Files
Now you need to Download OpenVPN Configuration Files according to your VPN Plan. Unzip the archive file and save the folder.
Alternatively, you can download the server configuration you need separately via this link.
Step 6 – Import Configuration Files
Once you have downloaded the files, go back to the control panel of your router and click Choose File in the “Import .ovpn file” section
Navigate to the configuration file you have just downloaded and click Open.
Click Upload. You should see the message Complete! when the file has been uploaded successfully.
Leave the box next to “Import the CA file or edit the .ovpn file manually” unchecked and click OK.
In the VPN Client tab, you will see the created connection. Click Activate to connect your router to ZoogVPN.
Enjoy! You have now taken control of your Internet freedom, privacy, and security.


