Before we start an active ZoogVPN subscription is required and your device must be connected to the Internet.
If you are faced with the task of setting up a proxy on your macOS laptop, then simply follow the instructions below and you will have a proxy set up on your laptop.
Instructions for setting up a proxy:
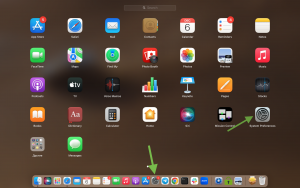
Step 1 – Open Settings.
The first step is to open system preferences, you can do this through the bottom panel or by pressing F4, this will open a menu and there you can find the system preferences icon.
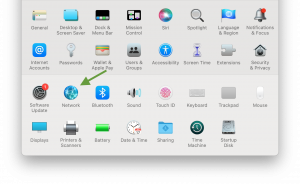
Step 2 – Going to Network Settings
In the settings that opened, find the Network icon and click on it.
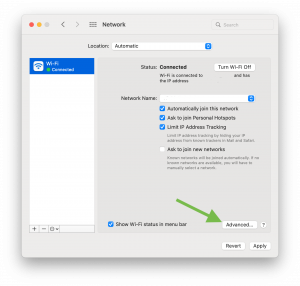
Step 3 – Network Selection
Next, select the network you are connected to and want to configure the proxy and click on the “Advanced…” button as shown in the screenshot.
Step 4 – Path to Enter Proxy Configurations.
Then, in the top bar, select “Proxies” and after it in the list that appears click on “SOCKS Proxy”.
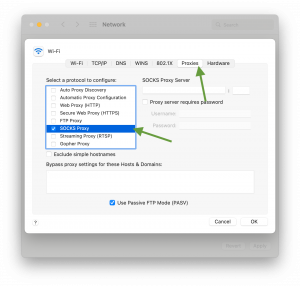
Step 5 – Entering Proxy Configuration.
Now it is necessary to fill in all lines correctly for proper proxy configuration. In the line where you are asked to enter a proxy server, you can specify any server from the list. For example dk1.zoogvpn.com or es1.zoogvpn.com.
In the line where you need to enter the proxy port, specify one of the proposed ones – 1080, 5060, or 41080.
In the fields that ask for your password and username, enter the login and password from your account that is registered with ZoogVPN. To save the configuration, press “OK”.

Finally, to apply these settings, click the “Apply” button in the bottom right corner. That’s all, by following these few simple steps you have successfully configured a proxy on your computer. After successfully configuring the proxy, make sure that it works correctly and that you are able to connect to it. To do this, check your IP address, if the IP location is the same as the country to which you configured the connection or it is just different from your real IP address, it means that everything is successfully configured.
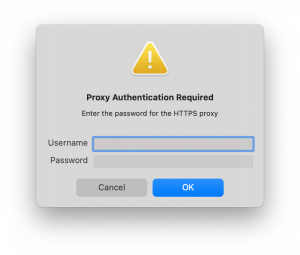
After connecting to the proxy you will get an additional authorization window popping up, this is normal practice. It is necessary to pass it, click “System Preferences”.

In the next window in the Username and Password fields, you need to enter your ZoogVPN account login and password that you specified when setting up the proxy.
Setting up a proxy is easy, but it is even easier and safer to use the VPN app from ZoogVPN. Also when using the VPN service you will have many more servers available to connect to. You can download and install the app on your MacOS device in just a couple of minutes.
Start using ZoogVPN today and stay safe online.
Don’t forget to connect with us on Facebook and Twitter. We strongly encourage Free Plan users to show their support on social media. Thank you.
Didn’t find an answer to your question? Contact our 24/7 customer support team here.


