Privacy and security are key points in online activities, that should be properly and effectively protected to avoid malware and cyberattacks. VPN is one of the most effective ways to protect your personal data and internet activity, but there is always space for improvement. This guide will provide a comprehensive, step-by-step guide on setting up ZoogVPN’s SOCKS5 (Socket Secure 5) proxy protocol with Proxifier. This powerful tool enables network connections to be redirected through a proxy server.
How to Setup ZoogVPN’s SOCKS5 proxy to Proxifier
Setting up a SOCKS5 ZoogVPN with Proxifier is a simple process that increases online security and privacy. By combining the robust features of ZoogVPN proxies with the versatile Proxifier tool, you can effectively route your internet traffic through a secure SOCKS5 proxy server. This guide will walk you through the process of setting up a ZoogVPN SOCKS5 proxy with Proxifier, ensuring that your network connections are secure and optimized for maximum throughput. Whether you’re looking to circumvent internet restrictions, improve connection speeds, or increase your privacy, this setup will provide you with a comprehensive solution.
Prerequisites
Before we dive into the setup process, ensure you have the following:
- A ZoogVPN subscription with access to SOCKS5 proxy servers.
- Proxifier installed on your device.
- Basic understanding of network configurations.
Step 1
Downloading and Installing Proxifier
To start, you’ll need to have a Proxifier installed on your system.
Follow these steps to download and install Proxifier:
- Visit the Proxifier official website.
- Download Proxifier, choose the version compatible with your operating system (Windows or Mac), and install it.
- Run the downloaded installer and follow the on-screen instructions to complete the installation.
Once installed, launch Proxifier to start the process.
Step 2
Subscribe to ZoogVPN and Get Details on SOCKS5 Proxy
If you haven’t subscribed to ZoogVPN yet, follow these steps to get started:
- Visit ZoogVPN’s Website to choose your plan.
- After subscribing to a plan that suits your needs, create your account.
- After subscribing, log in to your ZoogVPN account dashboard to retrieve the SOCKS5 proxy server address, port number, and account credentials.
Step 3
Configuring ZoogVPN SOCKS5 Proxy in Proxifier
With both installed Proxifier and ZoogVPN, proceed to set up the SOCKS5 proxy:
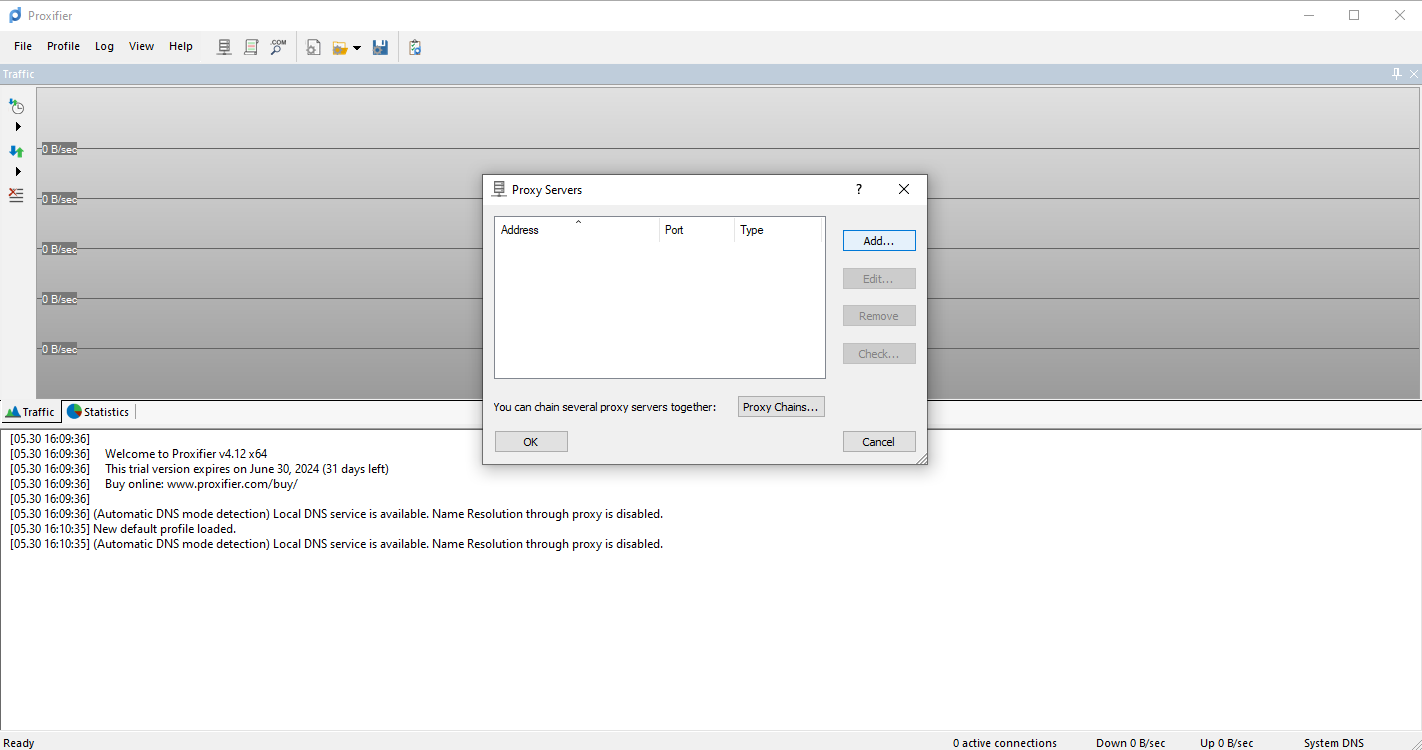
- Open the Proxifier app and add a new proxy server:
– Click on “Profile” in the menu bar and select “Proxy Servers”.

– In the Proxy Servers dialog box, click “Add” to create a new proxy server entry.
- Enter Proxy Details:
– In the “Address” field, input the ZoogVPN SOCKS5 proxy server address.

– In the “Port” field, enter the corresponding port number provided by ZoogVPN.
– And select “SOCKS5” as the protocol.
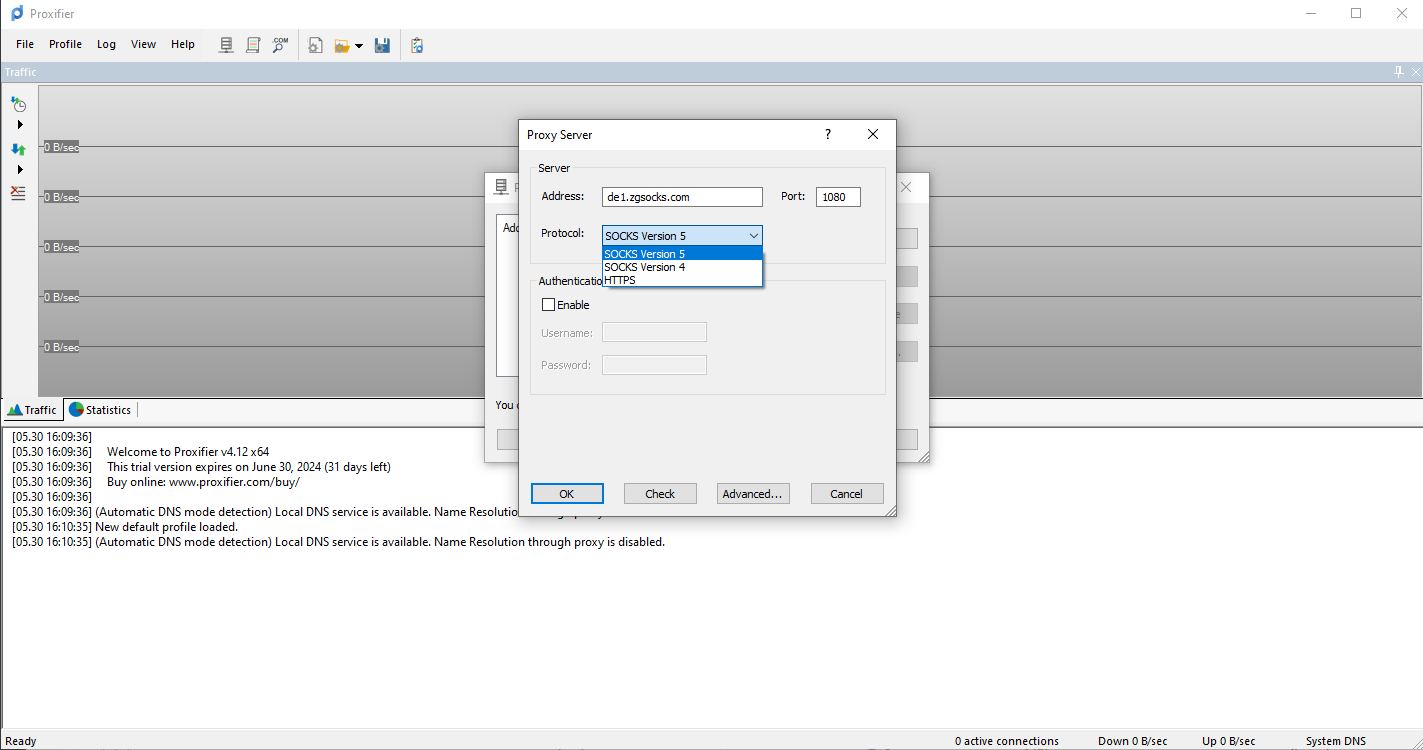
– Click on the “Enable” option to activate this proxy.
- Authentication:
– If authentication is required, check the “Enable” option under Authentication.
– Enter your ZoogVPN username and password.
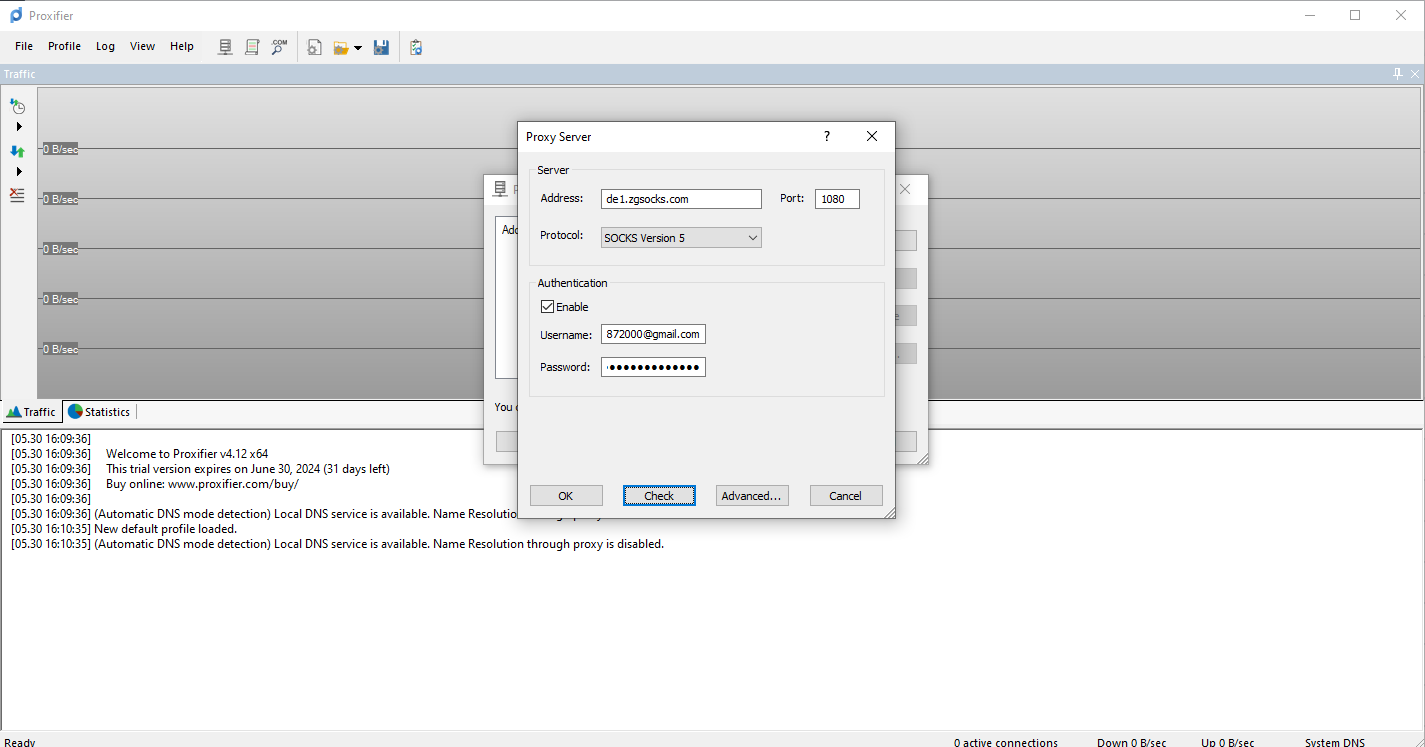
– Click “OK” to save the settings.
Step 4
Setting Up Proxification Rules
Next, you need to set up rules in Proxifier to determine which applications or connections should use the SOCKS5 proxy:
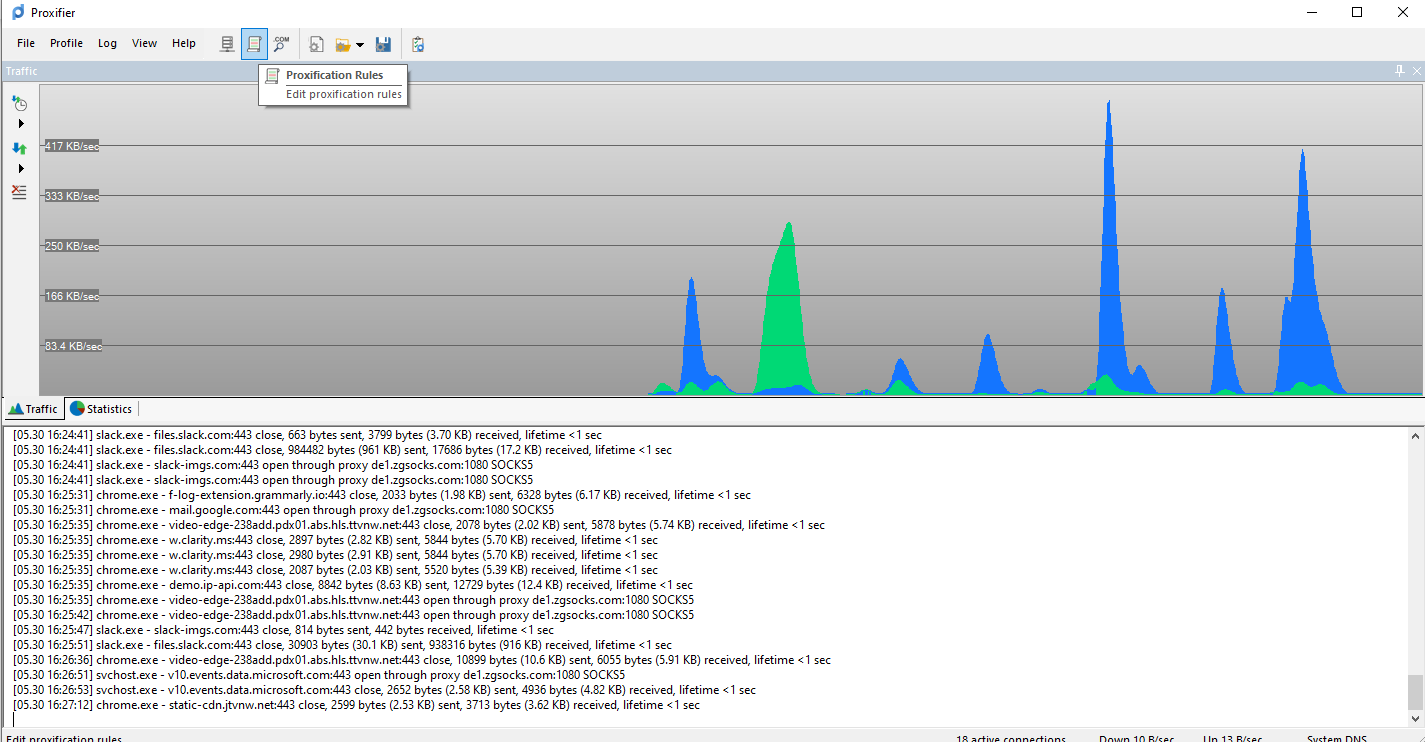
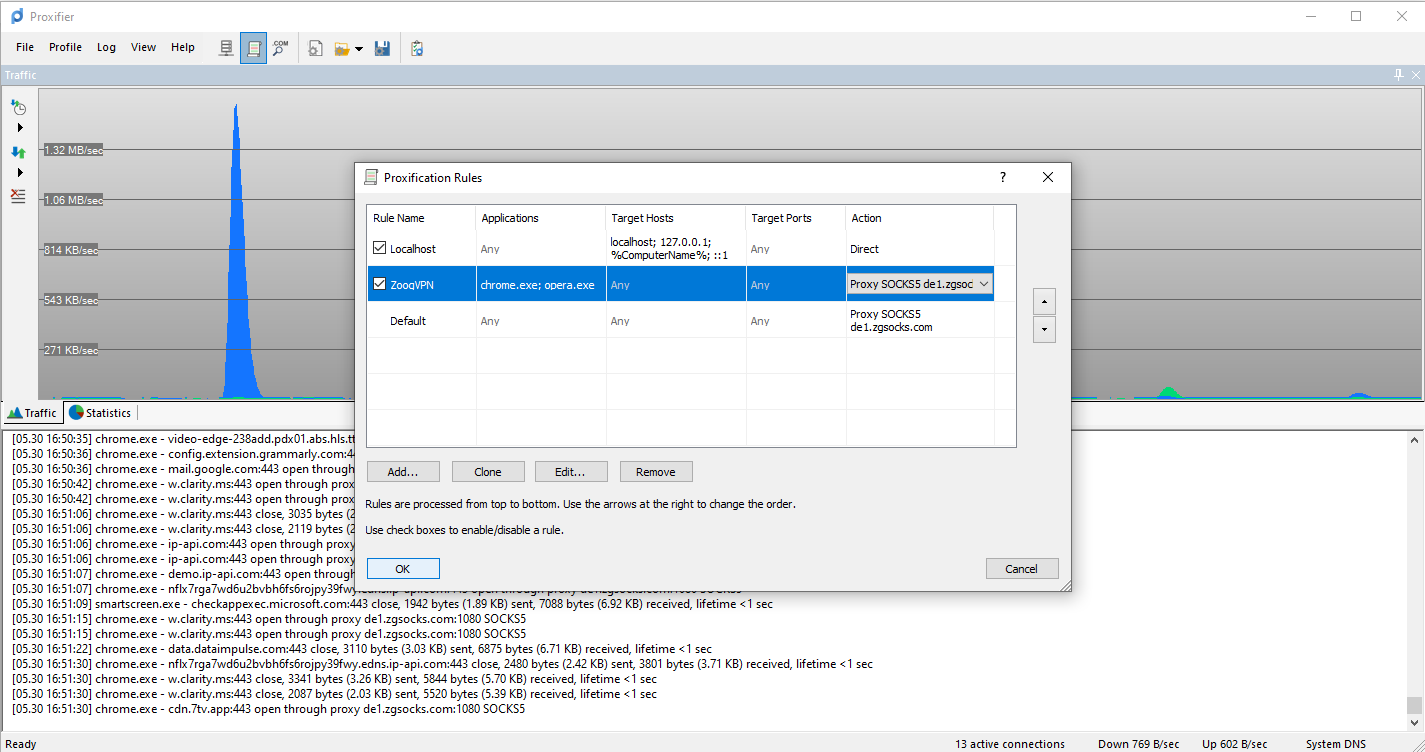
- Open Proxification Rules:
– In Proxifier, go to “Profile” and select “Proxification Rules”.
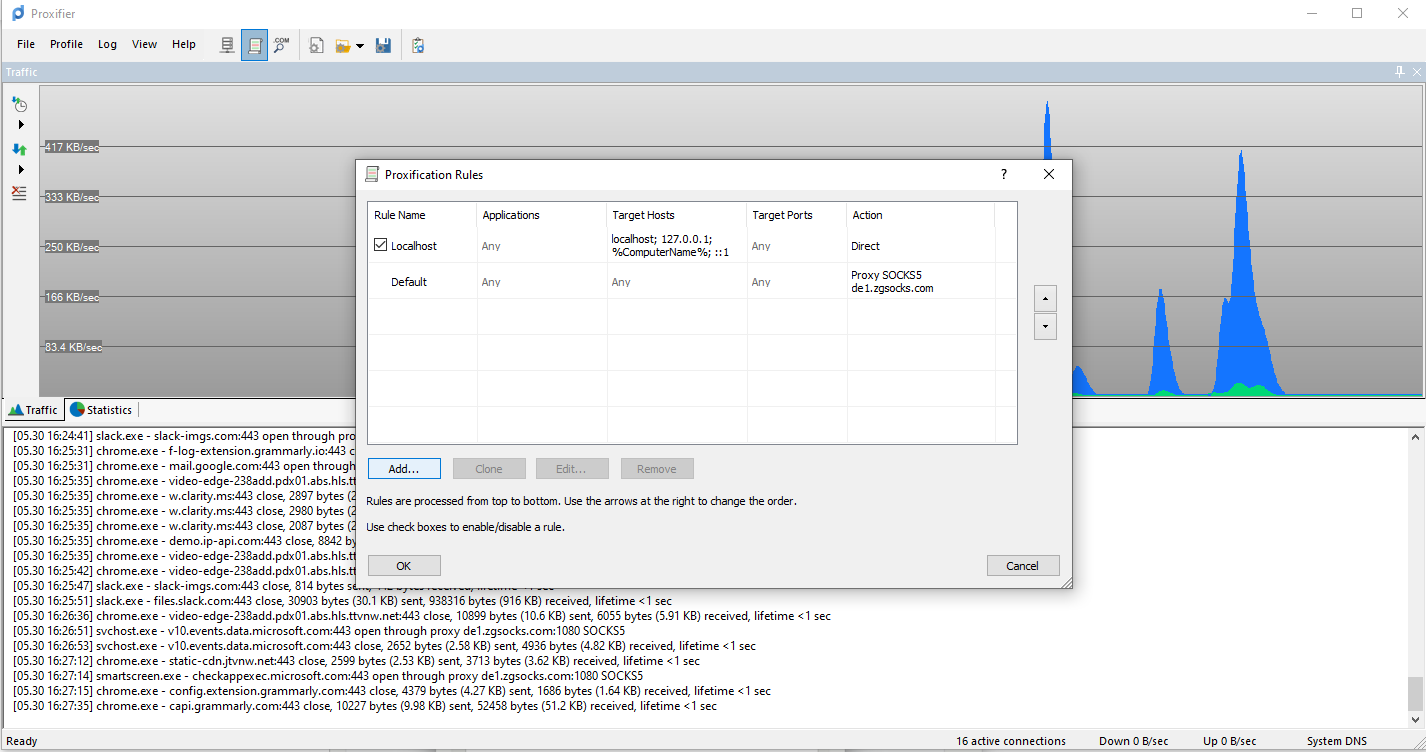
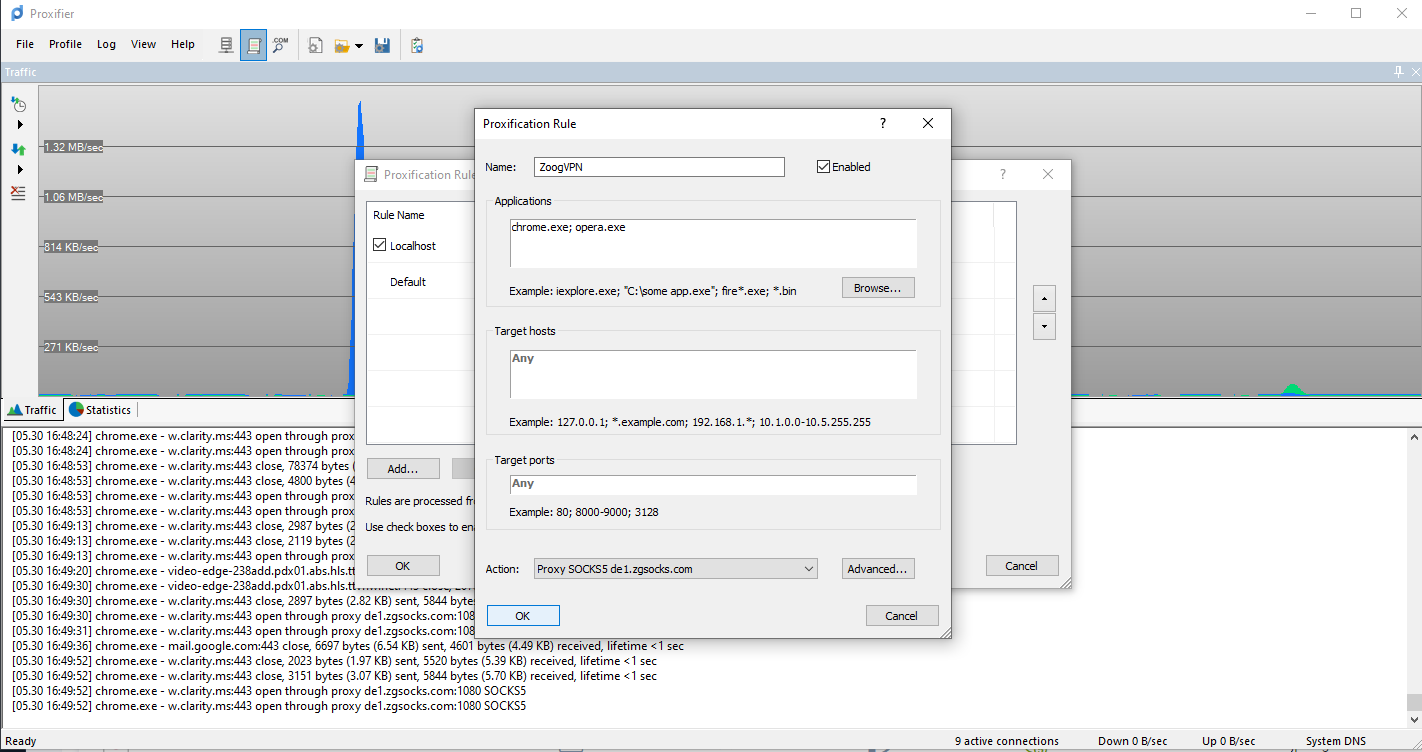
- Add a New Rule:
– Click “Add” to create a new rule.
– Name the rule appropriately (e.g., “ZoogVPN SOCKS5”).
- Define Rule Criteria:
– Specify the target apps or connections that should be routed through the proxy.
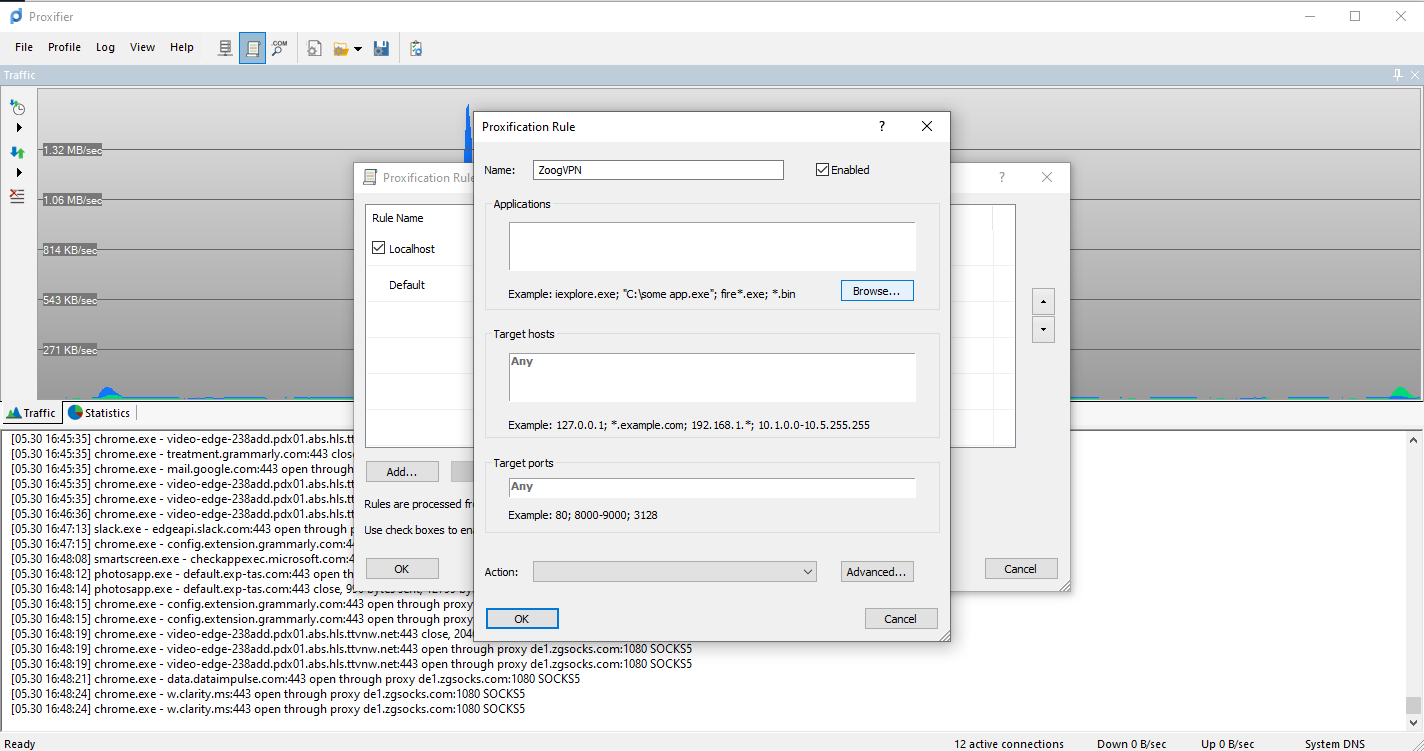
– You can define criteria such as IP address sets, ports, and protocols.
- Assign the Proxy:
– Under the “Action” section, choose “Proxy” and select the ZoogVPN SOCKS5 proxy server you configured earlier.
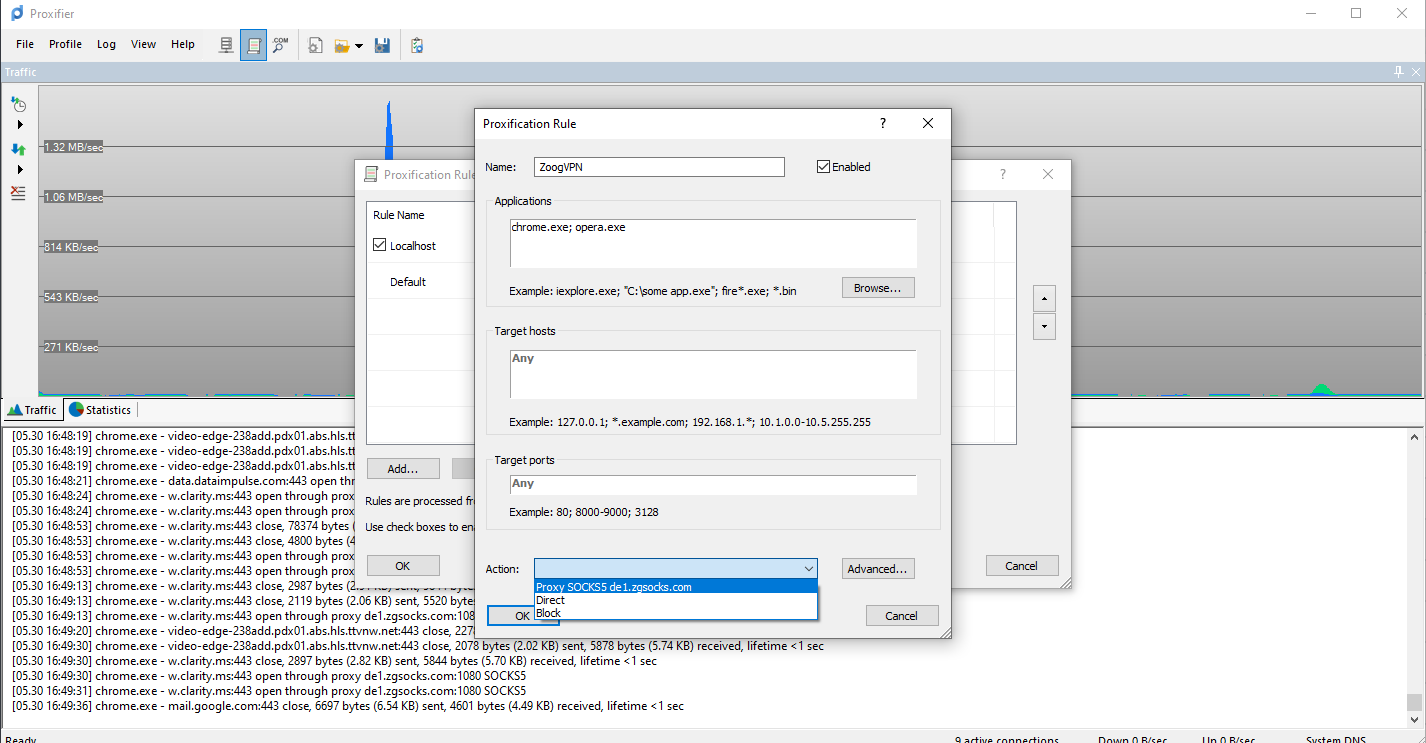
Click “OK” to save the rule.
Step 5
Testing the Proxy Configuration
To ensure everything is set up correctly, perform the following tests:
- Check Proxy Connection:
– In Proxifier, go to “Profile” and select “Proxy Servers”.
– Select the ZoogVPN SOCKS5 proxy and click “Check” to test the connection.
- Verify Proxification:
– Launch an application that you have configured to use the proxy.
– Use Proxifier’s logging feature to monitor the traffic and confirm that it is being routed through the ZoogVPN SOCKS5 proxy.
Solutions to Common Problems
Dealing with Socks5 connection problems in Proxifier can be quite frustrating. Whether you’re encountering connection failures, authentication issues, or app glitches, having the knowledge to troubleshoot these common problems can help you resolve them swiftly and effectively. Here are some solutions to guide you through managing these issues.
Connection Issues
- Incorrect Proxy Details: Double-check the server address, port number, and authentication credentials.
- Firewall or Antivirus Interference: Ensure that your firewall or antivirus software is not blocking Proxifier or the proxy connection.
Authentication Errors
- Invalid Credentials: Verify your ZoogVPN username and password.
- Subscription Status: Ensure your ZoogVPN subscription is active and supports SOCKS5 proxy usage.
App-Specific Issues
- Rule Configuration: Ensure that the proxification rules are correctly set up to include the target applications.
- Compatibility: Some applications might have specific proxy settings that need to be adjusted within the application itself.
Conclusion
Setting up ZoogVPN’s SOCKS5 proxy with Proxifier enhances your online security and privacy, allowing you to securely tunnel your internet traffic. By following this comprehensive guide, you can ensure that your network connections are protected and that you can access your corporate network or restricted content from anywhere.
Start using ZoogVPN with Proxifier today to secure your browsing!


